Interacting with the Dapp in a browser
Now we’re ready to use our Dapp!
Install and configure MetaMask
Install the MetaMask browser extension in Chrome or FireFox.
Once installed, you’ll see the MetaMask fox icon next to your address bar. Click the icon and MetaMask will open up.
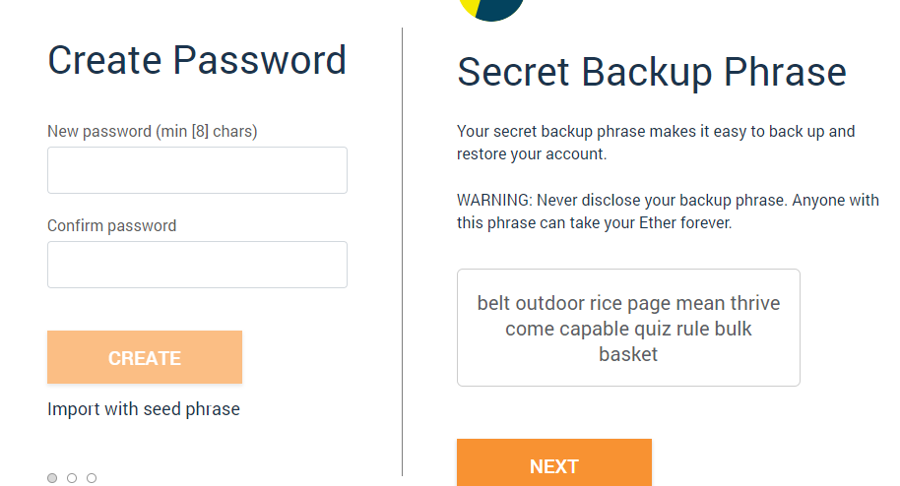
Create a New password. Then, write down the Secret Backup Phrase and accept the terms. By default, MetaMask will create a new Ethereum address for you.

Initiating MetaMask
4. Now we’re connected to the Ethereum network, with a brand new wallet with 0 ETH.
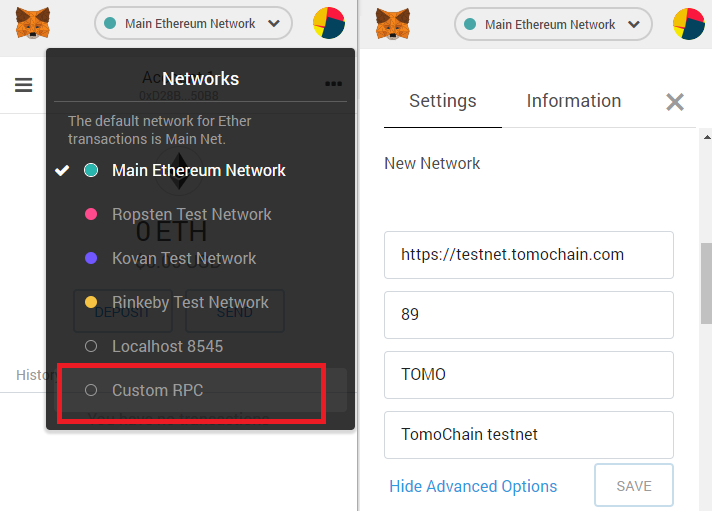
5. Let’s now connect MetaMask to Viction (testnet). Click the menu with the “Main Ethereum Network” and select Custom RPC. Use the Networks data from Viction (testnet) and click Save

Connecting MetaMask to Viction (testnet)
6. The network name at the top will switch to say “Viction testnet”. Now that we are on Viction network we can import Viction wallets.
We could use the VIC wallet we created previously, but better let’s create a new VIC wallet and add a few VIC tokens — you know how to do it.
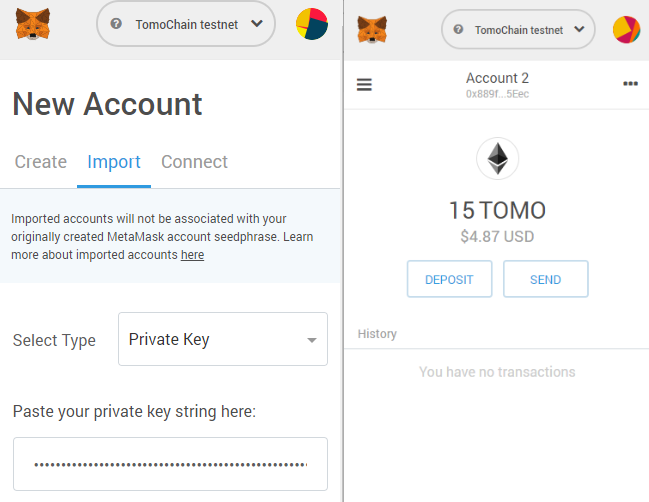
7. Once you have created your new VIC wallet, copy the private key. Back to MetaMask, click on the top-right circle and select Import Account. Paste the private key and voilà! Your VIC wallet is loaded in MetaMask

Importing a wallet
Using the Dapp
If you want to get started with your dApp quickly or see what this whole project looks like with a frontend, you can use Hardhat's boilerplate repo.
The first things you need to do are cloning this repository and installing its dependencies:
Front End App
In frontend you'll find a simple app that allows the user to do two things:
Check the connected wallet's balance.
Send tokens to an address.
It's a separate npm project and it was created using create-react-app, so this means that it uses webpack and babel.
Once installed, let's run Hardhat's testing network:
Then, on a new terminal, go to the repository's root folder and run this to deploy your contract:
Finally, we can run the frontend with:
Open http://localhost:3000/ to see your Dapp. You will need to have Coinbase Wallet or Metamask installed and listening tolocalhost 8545.(Example)
Last updated